Graphene underfloor heating is an advanced solution for efficient and comfortable home heating. This comprehensive guide will walk you through the installation process step by step.Preparation Before Installation
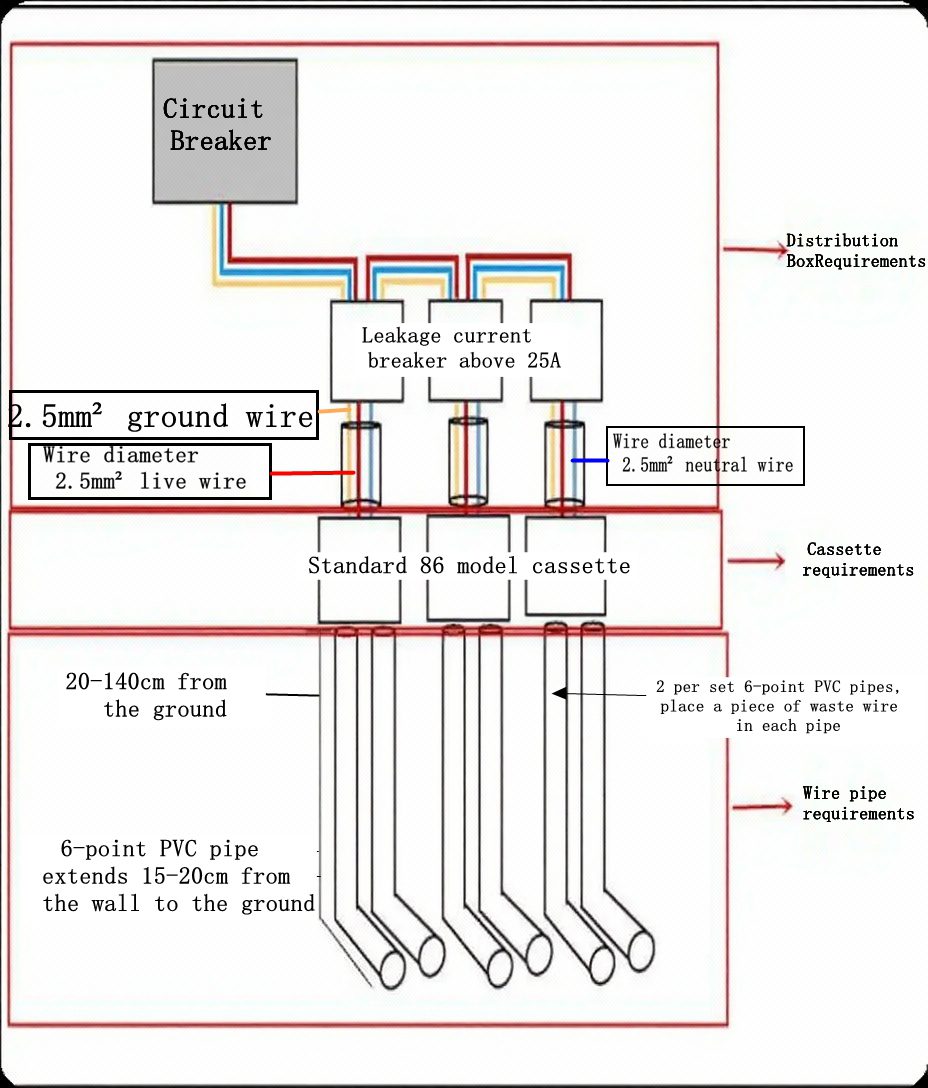
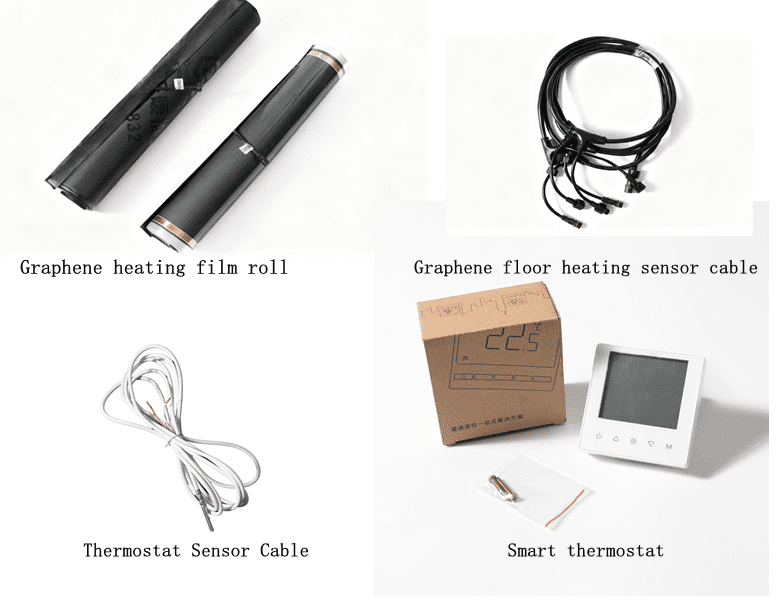
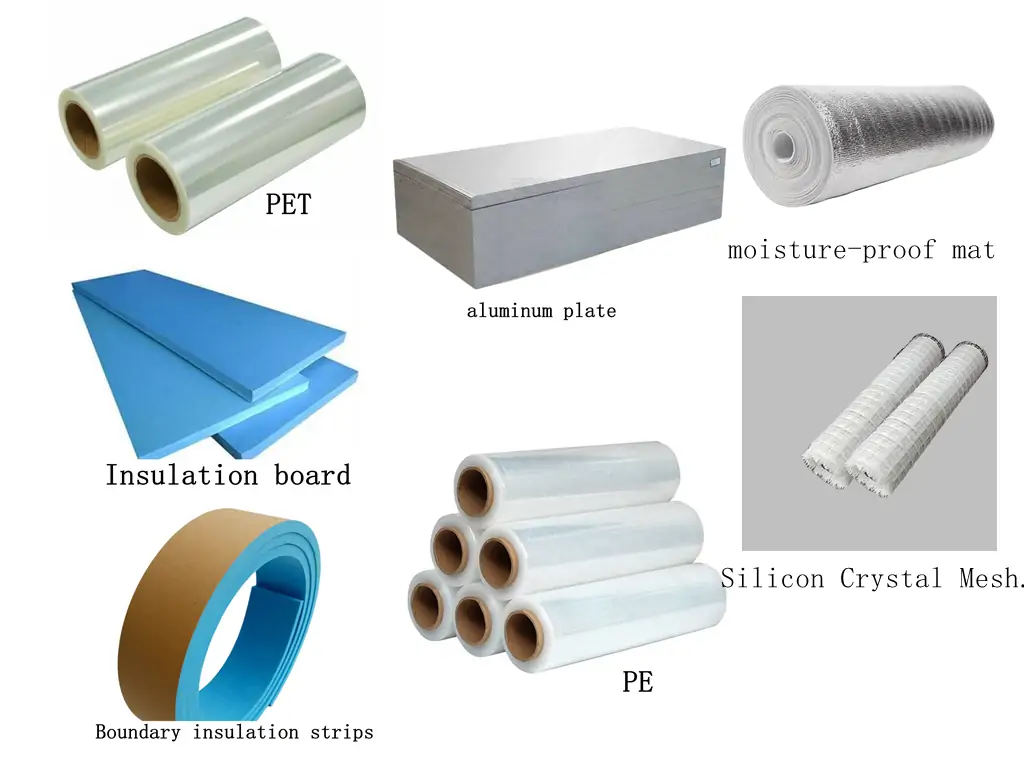
Before beginning your installation, gather all essential tools and materials: graphene heating film, insulation boards, moisture-proof mats, PET and PE protective films, cables, thermostats, temperature sensor wires, and basic hand tools. Ensure your power supply and distribution box are ready. All electrical work must be performed by qualified professionals for safety.
- Choose Your Installation Type
Dry Installation (Wooden Floor): Ideal for wood flooring, using XPS insulation boards and moisture barriers.
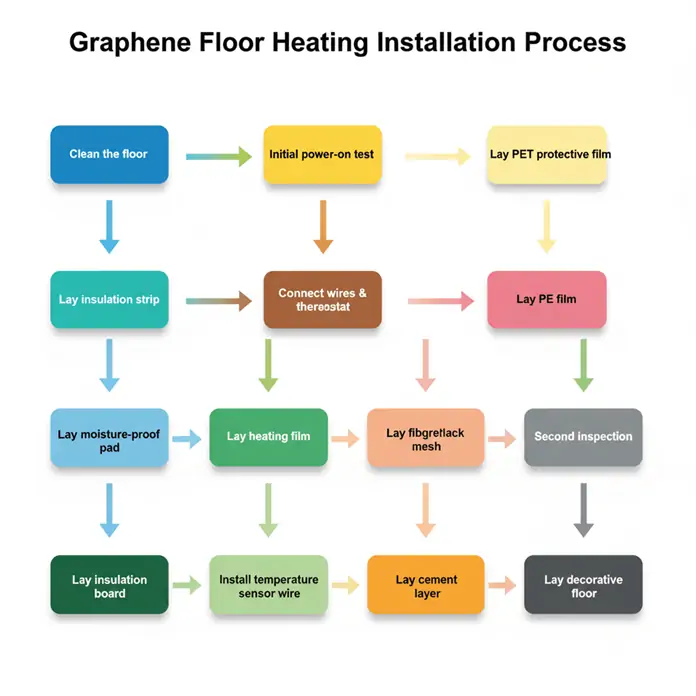
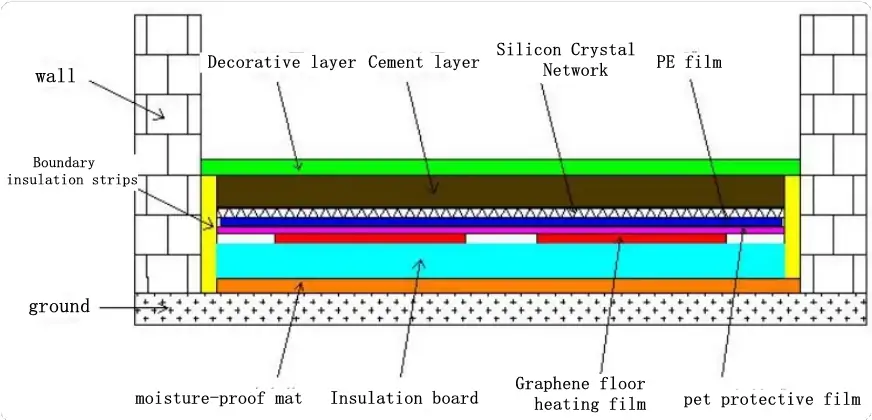
Wet Installation (Cement/Tile): Best for tile or concrete surfaces, requiring additional boundary insulation and silicon crystal mesh.
Overheat Protection for Wood: Includes added protection wires beneath wood flooring for enhanced safety.Step-by-Step Installation Guide
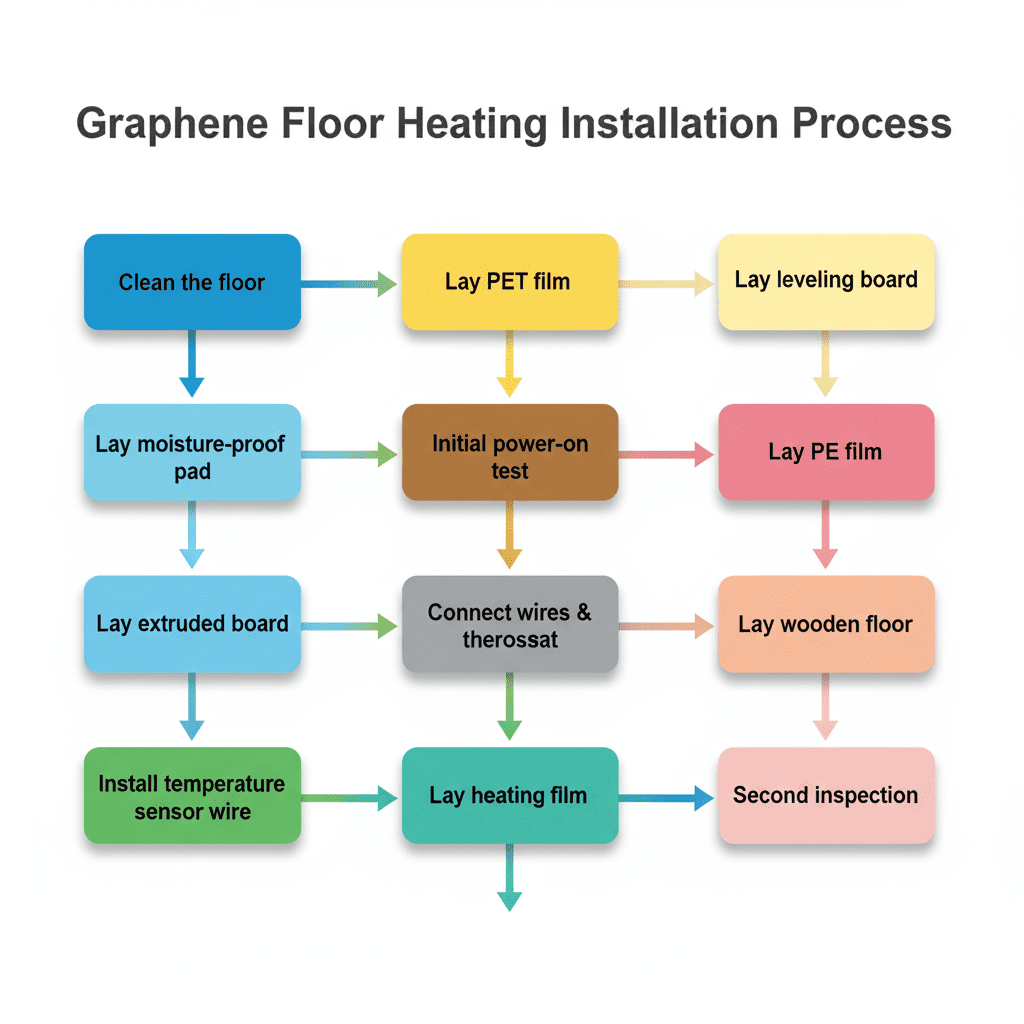
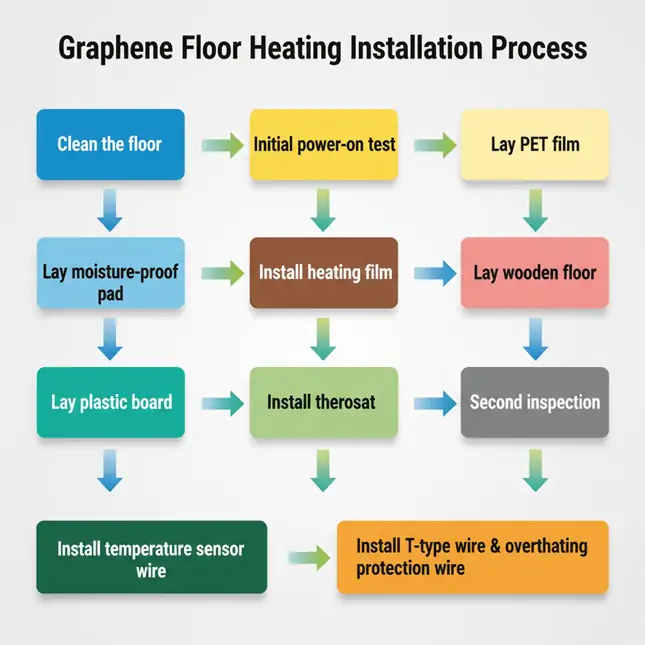
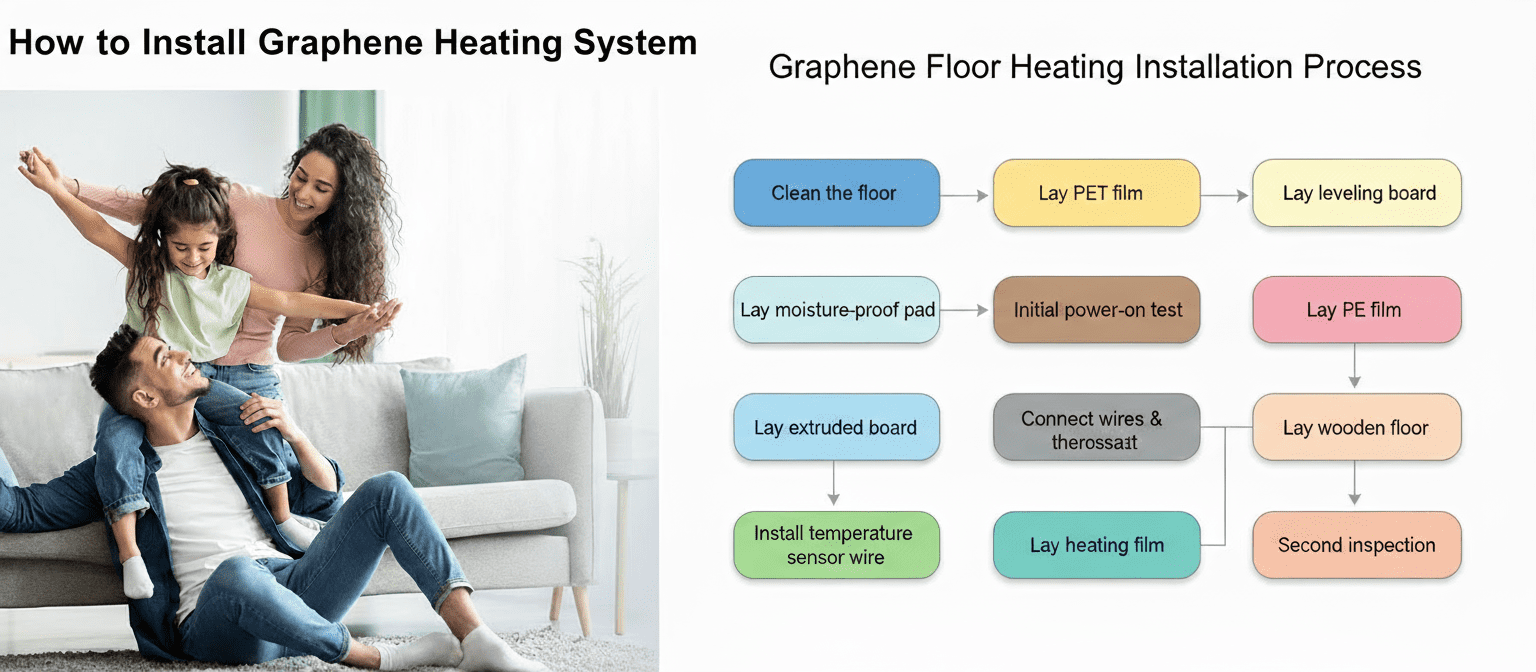
Step 1: Site Preparation
Thoroughly clean the floor, removing all debris and leveling the ground to meet specified flatness requirements.
Step 2: Lay Insulation and Moisture Barrier
Install moisture-proof mats (especially important at ground level), carefully sealing all seams. Place XPS insulation boards across the entire area, leaving appropriate expansion gaps at the edges.
Step 3: Install Sensors and Wiring
Run temperature sensor wires according to your design plan. Position sensor probes underneath the heating film and secure all cables with transparent tape. Ensure safe pathways for all wiring.
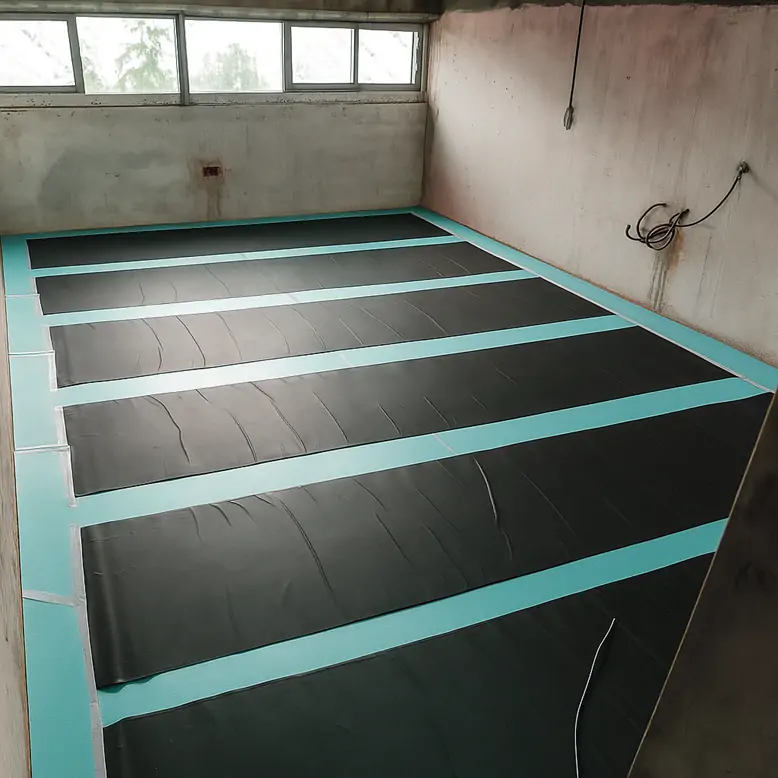
Step 4: Lay Graphene Heating Film
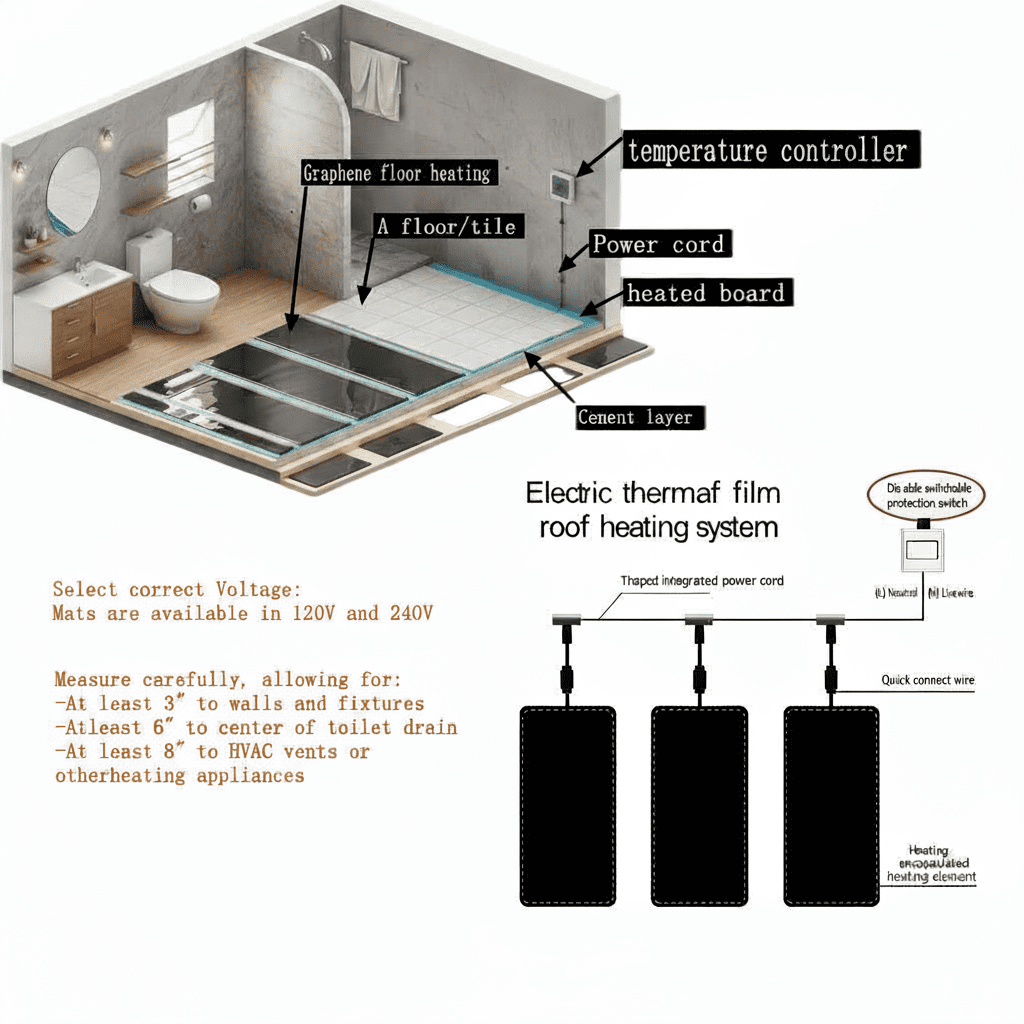
Carefully arrange the heating film sheets according to your layout plan. Never overlap the films and maintain proper distance from walls. Secure with tape and inspect for any damage.Step 5: Connect Electricals and Thermostats
Safely connect all cables to the thermostat and power supply. Use proper conduit for wiring and observe correct color codes for safety.
Step 6: System Testing
Power on the system for initial testing. Use an infrared thermometer to verify temperature rise and a clamp meter to test for leakage current. Address any irregularities before proceeding.
Step 7: Apply Protective Film and Flooring
Cover the heating film with PET protective film for durability, followed by PE waterproof film. Finally, install your chosen flooring material (wood, tile, etc.) directly above.
Step 8: Final Inspection
After complete installation, retest the entire system to confirm even heating distribution and check all connections are secure.
- Precautions and Maintenance Tips
Only qualified electricians should handle wiring work. Keep the installation site free of debris and avoid stepping directly on heating film during installation. Never mix concrete or apply excessive pressure on laid heating film. Regular cleaning and inspection will ensure long-term performance.
- Conclusion
Proper installation is essential for a safe and efficient graphene heating floor system. Always follow instructions carefully and consult professionals when uncertain. Enjoy the comfort and energy savings of modern underfloor heating in your home!